 Back to Docusign.com


How to use destination URLs to redirect PowerForms and envelopes
When signers finish, the handoff back to your website can feel abrupt or worse, they may see prompts that distract from your workflow. Destination URLs let you send signers to the right page every time, from a simple homepage redirect to a personalized “Thank you” experience or follow up a decline with a feedback survey.
Set destination URLs on a brand and apply that brand to your envelopes, templates, or PowerForms. For email envelopes, a quick signing setting removes the account sign-up prompt so the redirect is seamless.
- Keep signers on your site after completing or declining
- Reduce drop‑off by eliminating extra clicks or prompts
- Personalize confirmation pages with merge fields (for example, [[RecipientName]] )
- Create distinct post‑sign paths for Completed vs. Declined
- Instant redirect for PowerForms; one‑click Continue for email recipients
Example Use Case
You host a PowerForm on your website for service requests. On finish, redirect to /next‑steps with a tailored message like “Thanks, Joe—your request is complete.” If a signer declines, route to /need‑help with alternate contact options.
How to use destination URLs for PowerForms and envelopes
- Set destination URLs on your brand
- Go to Admin > Brands, select your brand, click Edit, then open Advanced configuration.
- Under Destination URLs, enter HTTPS links for Signing Completed and Decline (for example, https://yourdomain.com/thank‑you and https://yourdomain.com/declined).
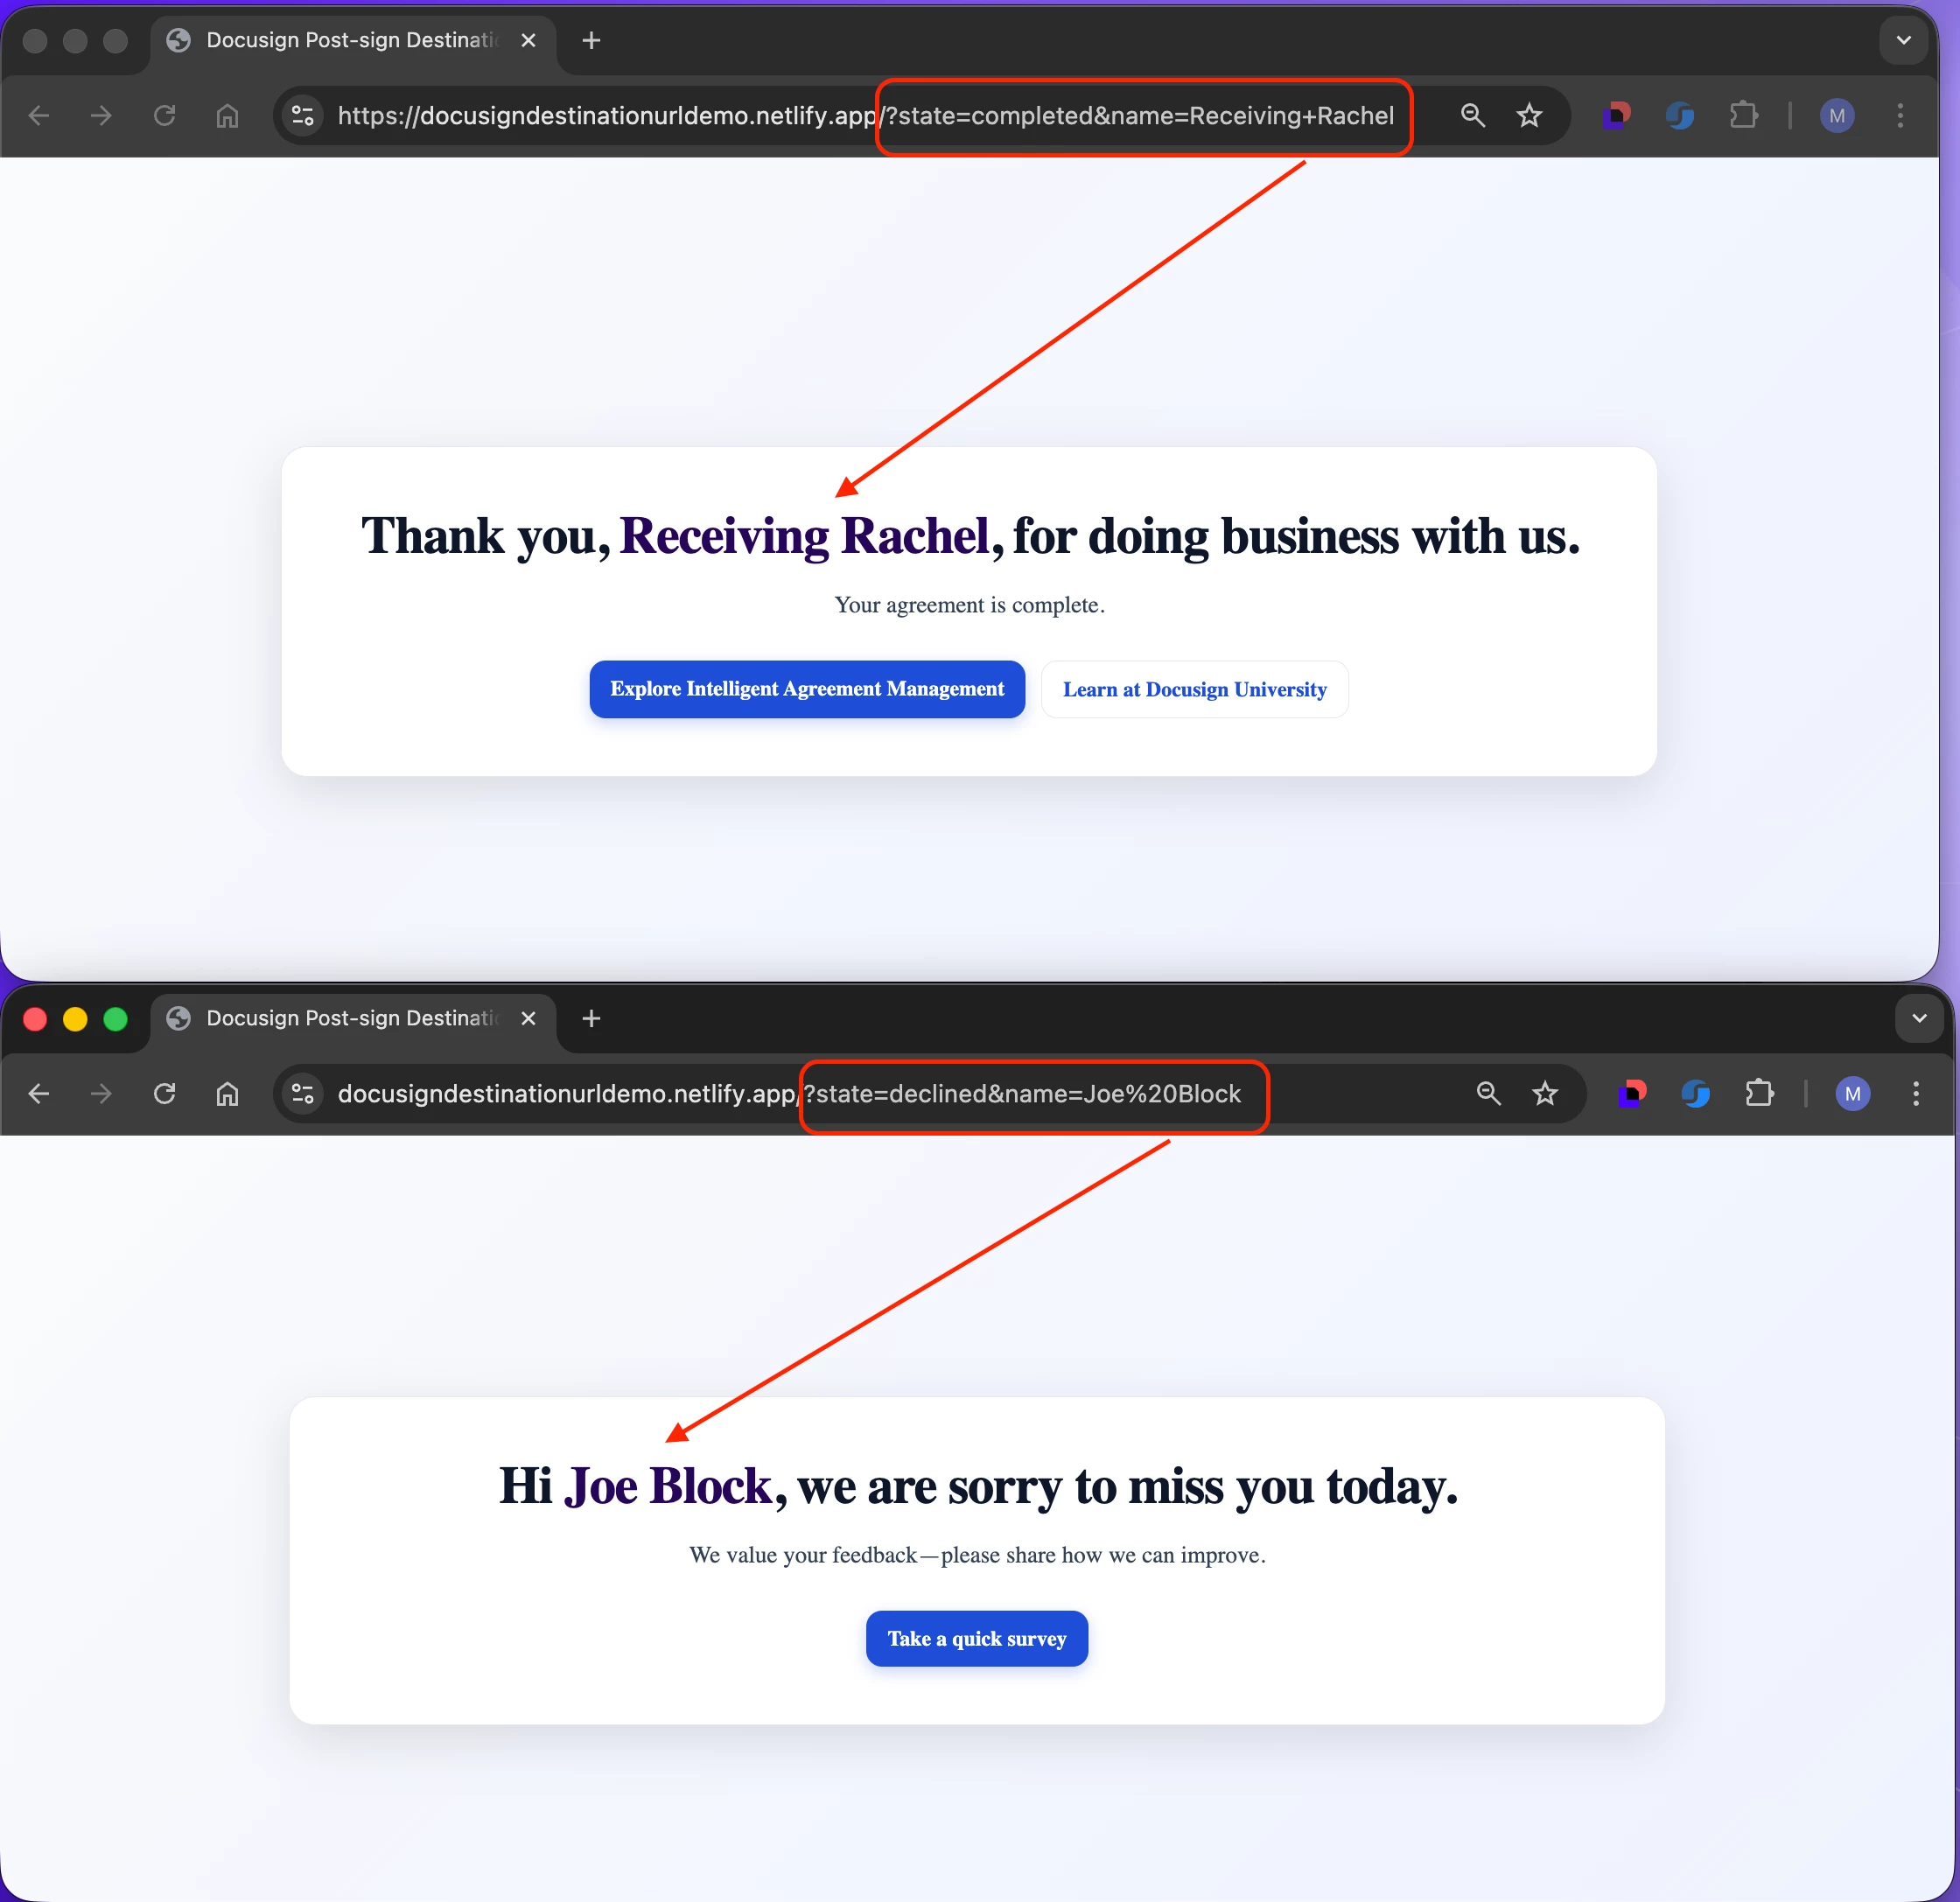
- Optional: Personalize with parameters. Click Insert Merge Field to add [[RecipientName]] and append query strings, for example: https://yourdomain.com/thank‑you?state=completed&name=[[RecipientName]]
- Apply the brand where you send from
- Make this brand the default, or on a template/envelope open Advanced Options and select the brand.
- For PowerForms, ensure the underlying template uses this brand.
- Make email envelopes seamless
- Go to Admin > Signing Settings. Under Recipient, uncheck “Allow recipients to create a Docusign account.”
- Result: after signing, recipients see a clean Continue button that triggers your redirect immediately.
- Test both paths
- Send yourself a test envelope and complete/decline to verify redirects.
- Launch and complete a PowerForm; the redirect should trigger instantly on Finish.
- Confirm your website correctly reads any query parameters.
Example:
Video: Watch a walk-through of the setup
See the end-to-end setup and a quick demo of parameterized links for a personalized experience.
Best practices
- Always use HTTPS and avoid passing sensitive or regulated data in query strings; stick to non‑sensitive values like names or envelope IDs.
- URL‑encode parameter values to prevent errors (spaces, special characters).
- Provide separate landing pages for Completed and Declined with clear next steps.
- Document which templates/PowerForms use each brand to keep redirects consistent.
- Coordinate with your web team so landing pages gracefully handle missing or unexpected parameters.
Additional resources
- Administration - Destination URLs for Post-Signing Navigation
- Administration - Specify Post-Signing Destinations / Insert Merge Fields
- PowerForms Branding Considerations - Destination URLs
Join the Conversation
How are you using destination URLs, simple redirects or personalized confirmations? Share your use cases or questions in the comments and I’ll help you fine‑tune the setup.