 Back to Docusign.com


Need to limit which documents each recipient can view, without sending multiple envelopes? Document Visibility in Docusign eSignature lets you show or hide specific documents per recipient within a single envelope, protecting sensitive information and simplifying your workflow.
By configuring visibility once, you can keep a single audit trail, reduce errors and costs, and ensure every recipient only sees what they need.
- Show or hide documents per recipient to protect sensitive content
- Keep one envelope and audit trail for cleaner compliance
- Apply account-wide rules or let senders set visibility per envelope
- Prevent confusion for CCs and non-signers by limiting what they can view
- Save time by avoiding duplicate envelopes and manual redaction
Example Use Case
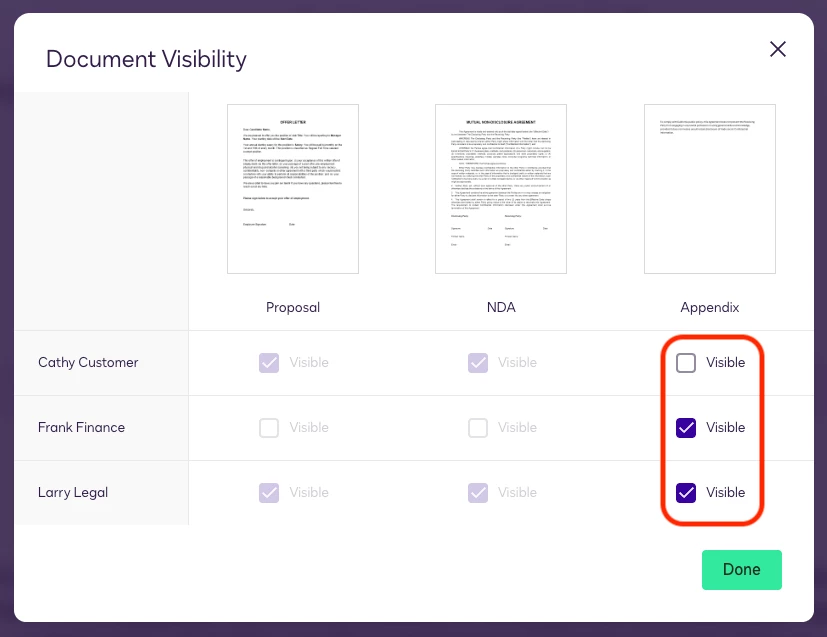
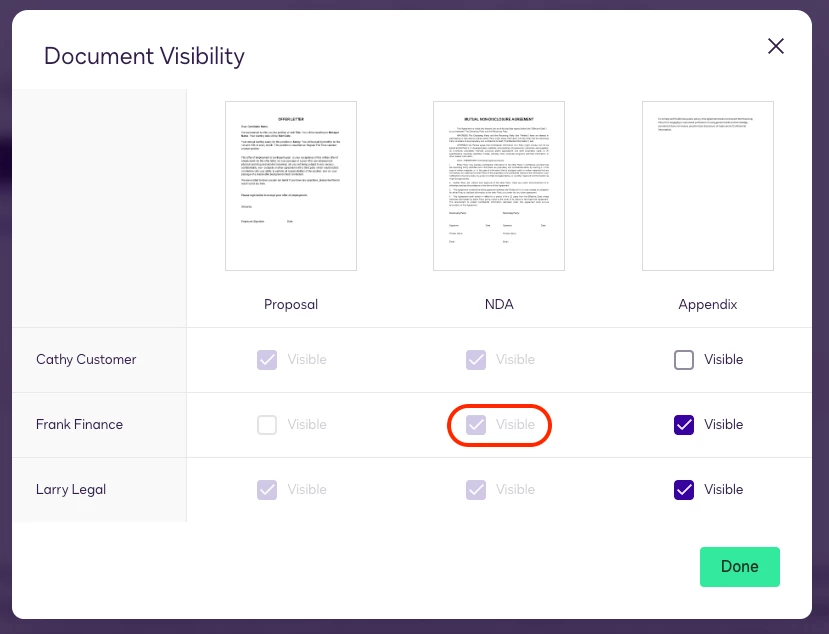
A sales envelope includes a proposal, an NDA, and a pricing appendix. The customer sees the proposal and NDA only. Internal Finance sees the pricing appendix; Legal sees all three. You maintain confidentiality while tracking everything in one envelope.
How to configure document visibility
- Enable at the account level (admins): Go to Account Settings > Sending Settings and turn on Document Visibility. Choose “Sender can set …” to allow per-envelope control, or “Must sign to view …” to enforce visibility across all envelopes. Use “… unless a member of sender’s account” if internal users should see all documents.
- Set visibility on an envelope: If allowed by your admin, open Advanced Options and toggle “Recipients must be signers to view signed documents.”
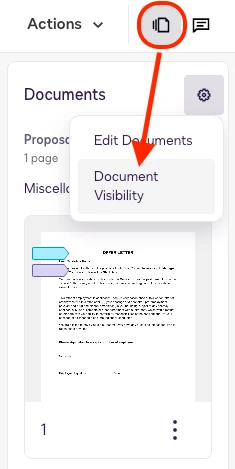
- Open the visibility table: In the document editor, click the Documents Icon in right-upper corner (previous UI: click into a page to switch from field properties to page view). Then select the gear icon (Document Settings) to open the document visibility table/control matrix.
- Configure who sees what: For each document, select which recipients can view it. In general, recipients must have at least one assigned field (e.g., signature, initials, text) on a document to view it. If a document has no fields, visibility can be set for any recipients.
Workaround: if a document has a field for one recipient and you need another recipient to see it, add an optional, read-only text field for that recipient so no input is required, then set visibility in the table.

- Review and send: Use Preview to confirm which documents each recipient will see and validate your policy (internal transparency vs. need-to-know). For high-sensitivity workflows, spot-check with a test envelope before rollout.
Video: Watch a walk-through of the topic
Follow along in a short walk-through to see how to enable Document Visibility and configure the visibility table step by step.
Best practices
- Decide your default policy first (open-by-default vs. need-to-know) and set account rules accordingly.
- Name documents clearly so senders can apply visibility confidently and recipients know what they’re viewing.
- Ensure each intended viewer has at least one field on the document; otherwise they won’t see it.
- Use per-envelope settings for exceptions; use account-wide rules for consistent enforcement.
- Test critical envelopes with a small internal group before rolling out broadly.
Additional resources
-
Use Document Visibility to Control Recipient Access, Set Document Visibility
- Some Things To Know About Document Visibility.
- What's the difference between Allow Sender to Specify Document Visibility and Sender Can Set... ? (Admin Settings)
- From the Trenches: Deep dive into document visibility (Developers)
Join the Conversation
How are you using Document Visibility to tailor access for signers and CCs? Share your routing patterns, table setups, and questions in the comments below 👇, your insights help the community.