I run a custom cabinet manufacturing business, and our designers are responsible for selling a project to a client. The Designers are responsible for negotiating with the client and closing the deal. When they do, they are required to fill out a contract with the details of the project. Sometimes, the Designers get the details wrong. A Service Coordinator should inspect the contract and adjust anything the designer got wrong (this means editing contract fields inputted by the designer). The Designer just fills out information, they never sign the contract, only the client.
Once the Service Coordinator edits and finalizes the agreement (sometimes they have to add additional pages from the standard contract to cover ourselves when customers make special selections - e.g., including the color cabinet they chose in the contract), the Service Coordinator sends the DocuSign contract to the client for eSignature.
I’ve tried to find Collaborative Fields and don’t see them in my toolset when creating a Template and adding fields. I searched online to see if it’s because I have the wrong plan, but even a search on the feature list by plan does not reference which plan is needed for Collaborative Fields. Similarly, I’ve looked for a plan that allows for Document Markup and cannot find that feature anywhere.
My ultimate goal is to:
Create a PowerForm
Designer clicks on the PowerForm link and fills out the contact details
DocuSign notifies the Service Coordinator that a contract is ready for review.
Service Coordinator edits any fields entered by the Designer and possibly fields the Designer missed.
Service Coordinator sends the client the DocuSign.
Client signs the DocuSign.
Does anyone have any ideas how I can accomplish this?
Ideally, this can all be done inside of DocuSign, but if I need to create a Google Form for the Designers and then use Zapier to populate the contract info (i.e., create the envelope), then have the Service Coordinator edit that, that’s fine, too. I'm just trying to get this done.
Best answer by Drewcifer
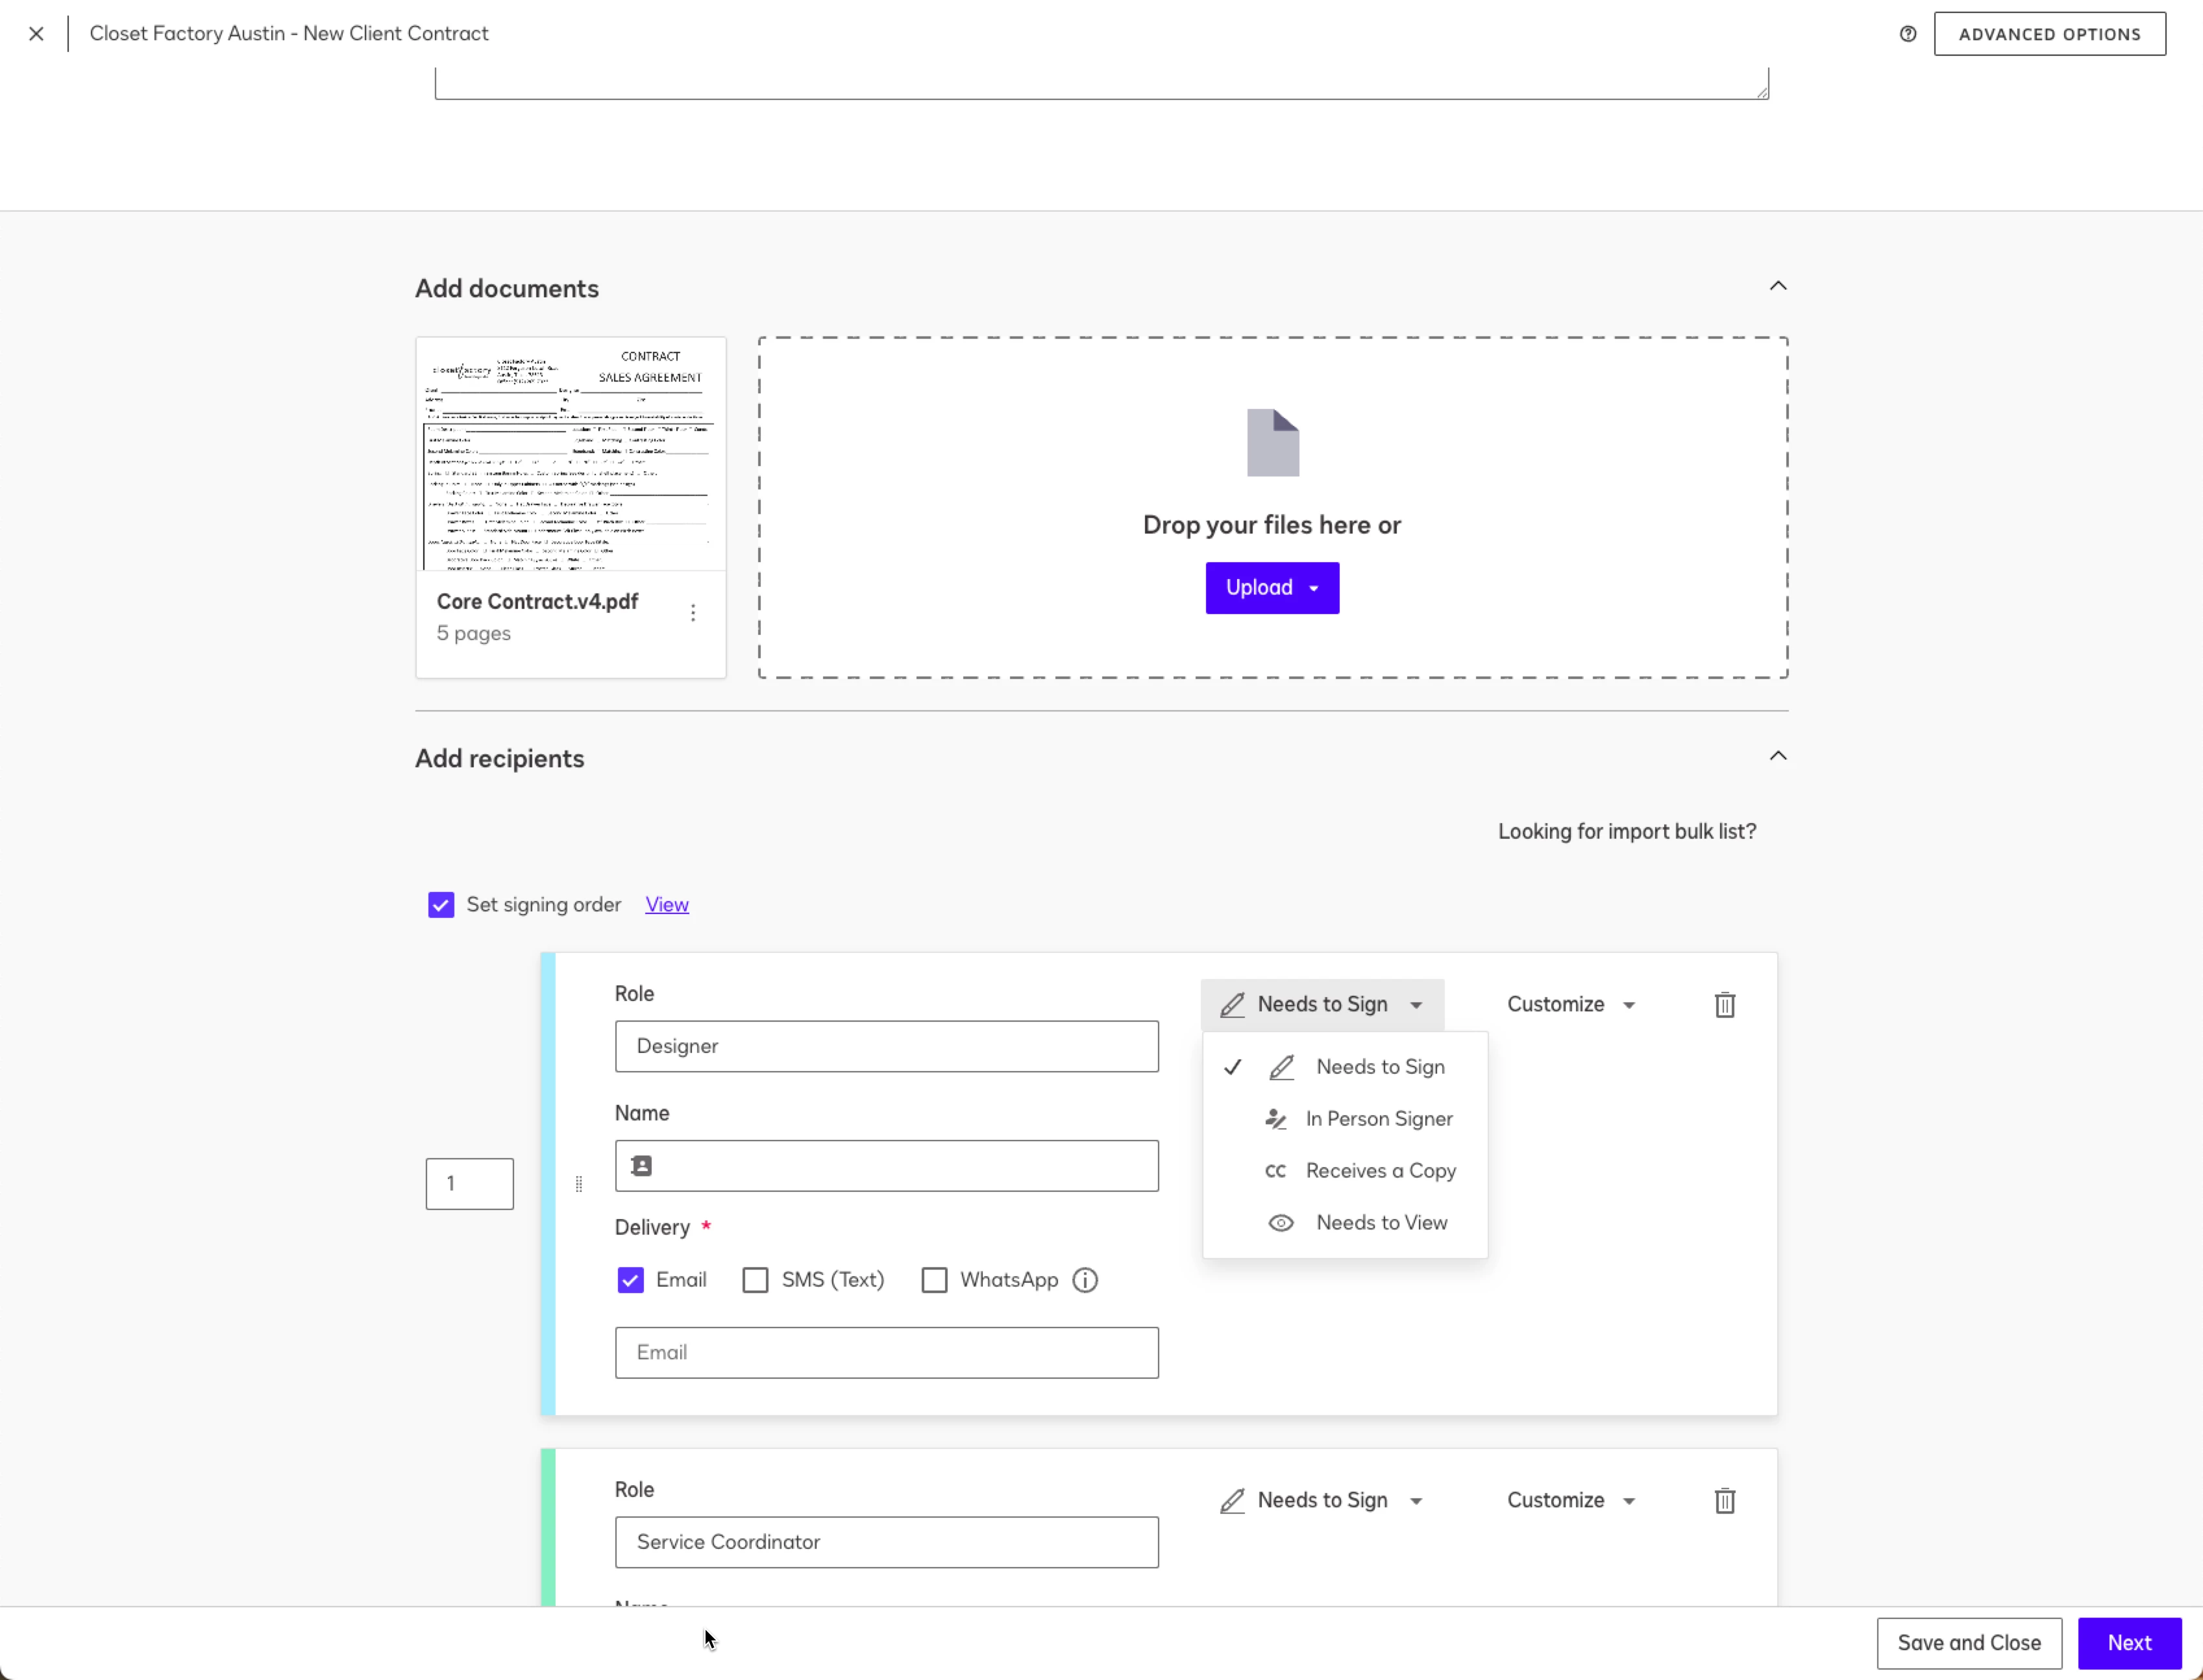
Create a new template for your base contract. Add your document(s) and check the box to “Set signing order”.
First recipient role is “Sales Rep”. Set their required action to “Allow to Edit”.
Second recipient role is “Service Coordinator”. Set their required action to “Allow to Edit”.
Third recipient is role “Client”. Set their required action to “Needs to Sign”.
Set your email message if desired, and click Next to go to the document prep phase.
Add all your other input blocks to the document, and assign them all to “Client”. Make them all “read only”. Add the signature block for Client and the date signed stamp.
Now it's time to use the template.
Sales rep sends the envelope, with themselves, your coordinator, and your client emails entered. Because the signing order is declared and Sales Rep is first, only the Sales Rep receives the email yet.
The contract will show up in the Sales Reps inbox and say they need to manage it. Upon opening the envelope, they are asked to make changes or approve it as-is. They’ll select make changes.
They can now edit the recipients if they need to, and then they’ll go to the document prep screen/phase and enter the values of the text as needed. They can also upload additional documents/templates. Once they are done, they’ll click the button to send/mark their changes complete.
Which triggers the envelope to send to the next recipient: The Service Coordinator. They’ll go through the same steps as the Sales Rep, changing text where needed. Once they are satisfied, they will click the button to send/mark their changes complete.
Which triggers the invitation to sign email for the next recipient: The client. The client can see all the info that has been entered--but can not change it because the fields are all read-only, and if they approve, they can click to sign.
That’s it. If you wanted, you could add the rep and supervisor into the signing order again before the client--but this time with Needs to Sign requirements. And give each of them signature/initial blocks. That way their names would appear on the Document and you’d know the rep signed off on the supervisor’s changes. Or you could just add their names as text boxes the first go-round.
You could also set up your additional pages that are sometimes needed as templates. As long as the role names match, they’ll join up fine.
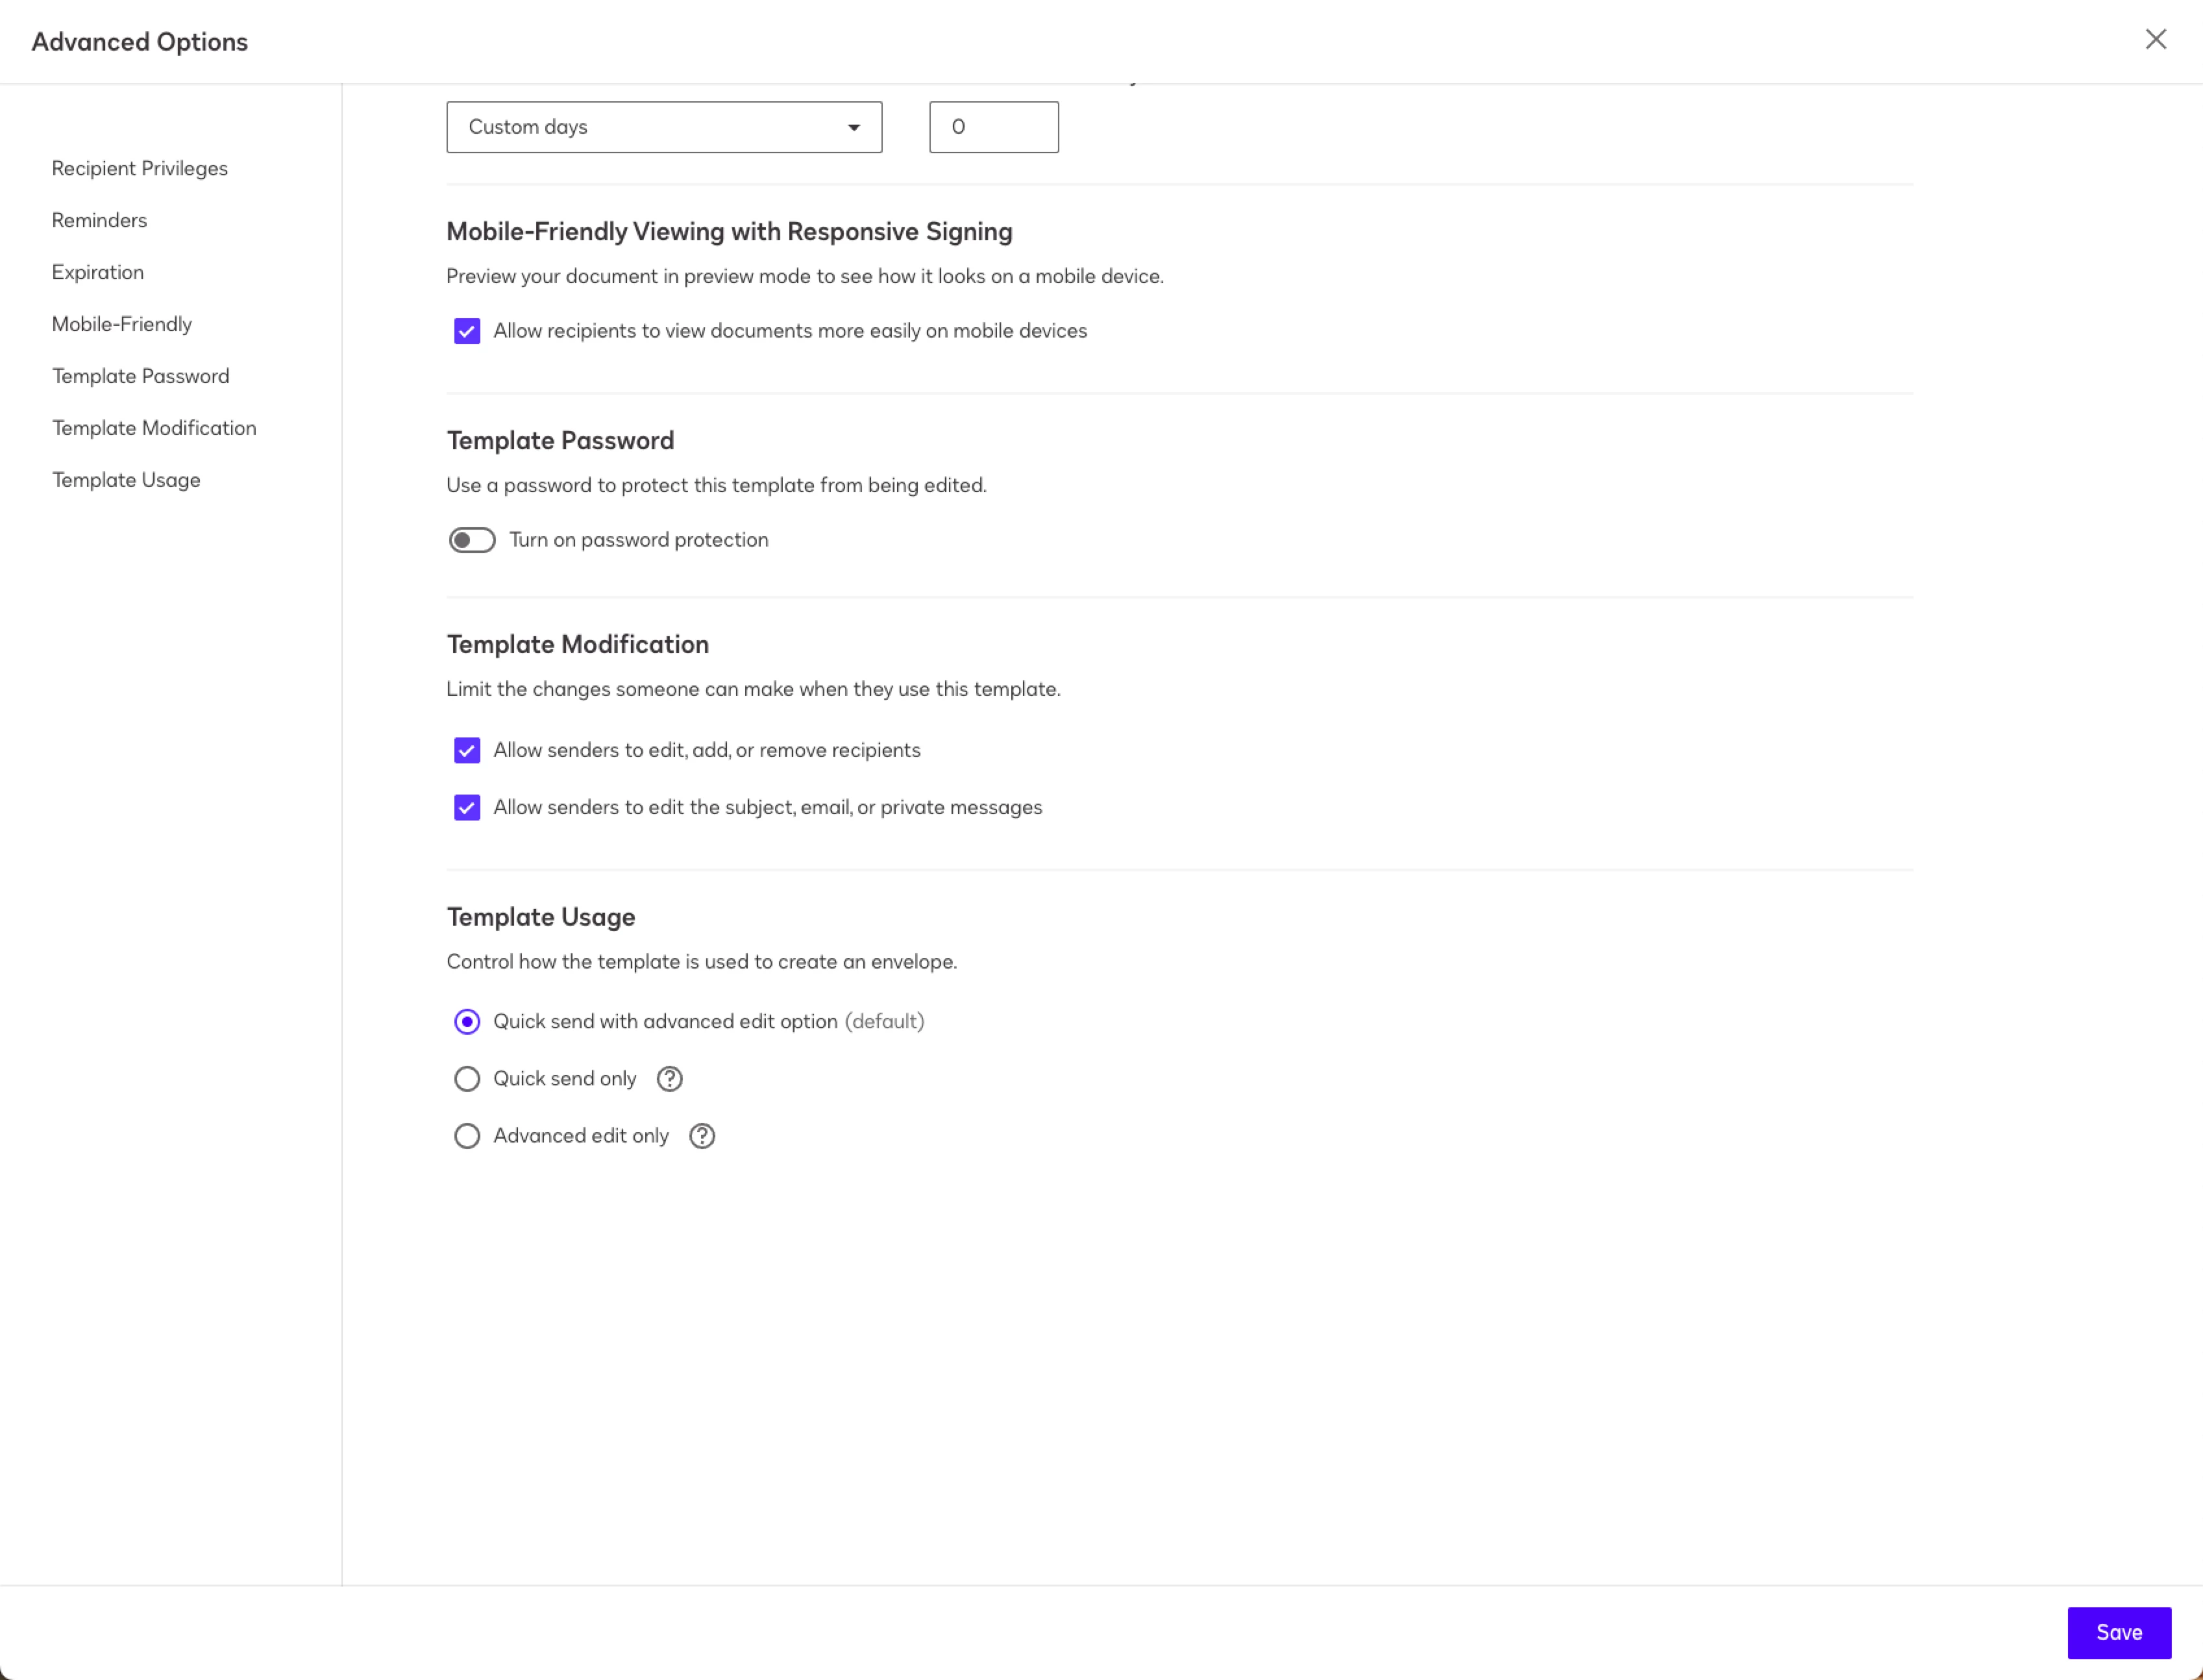
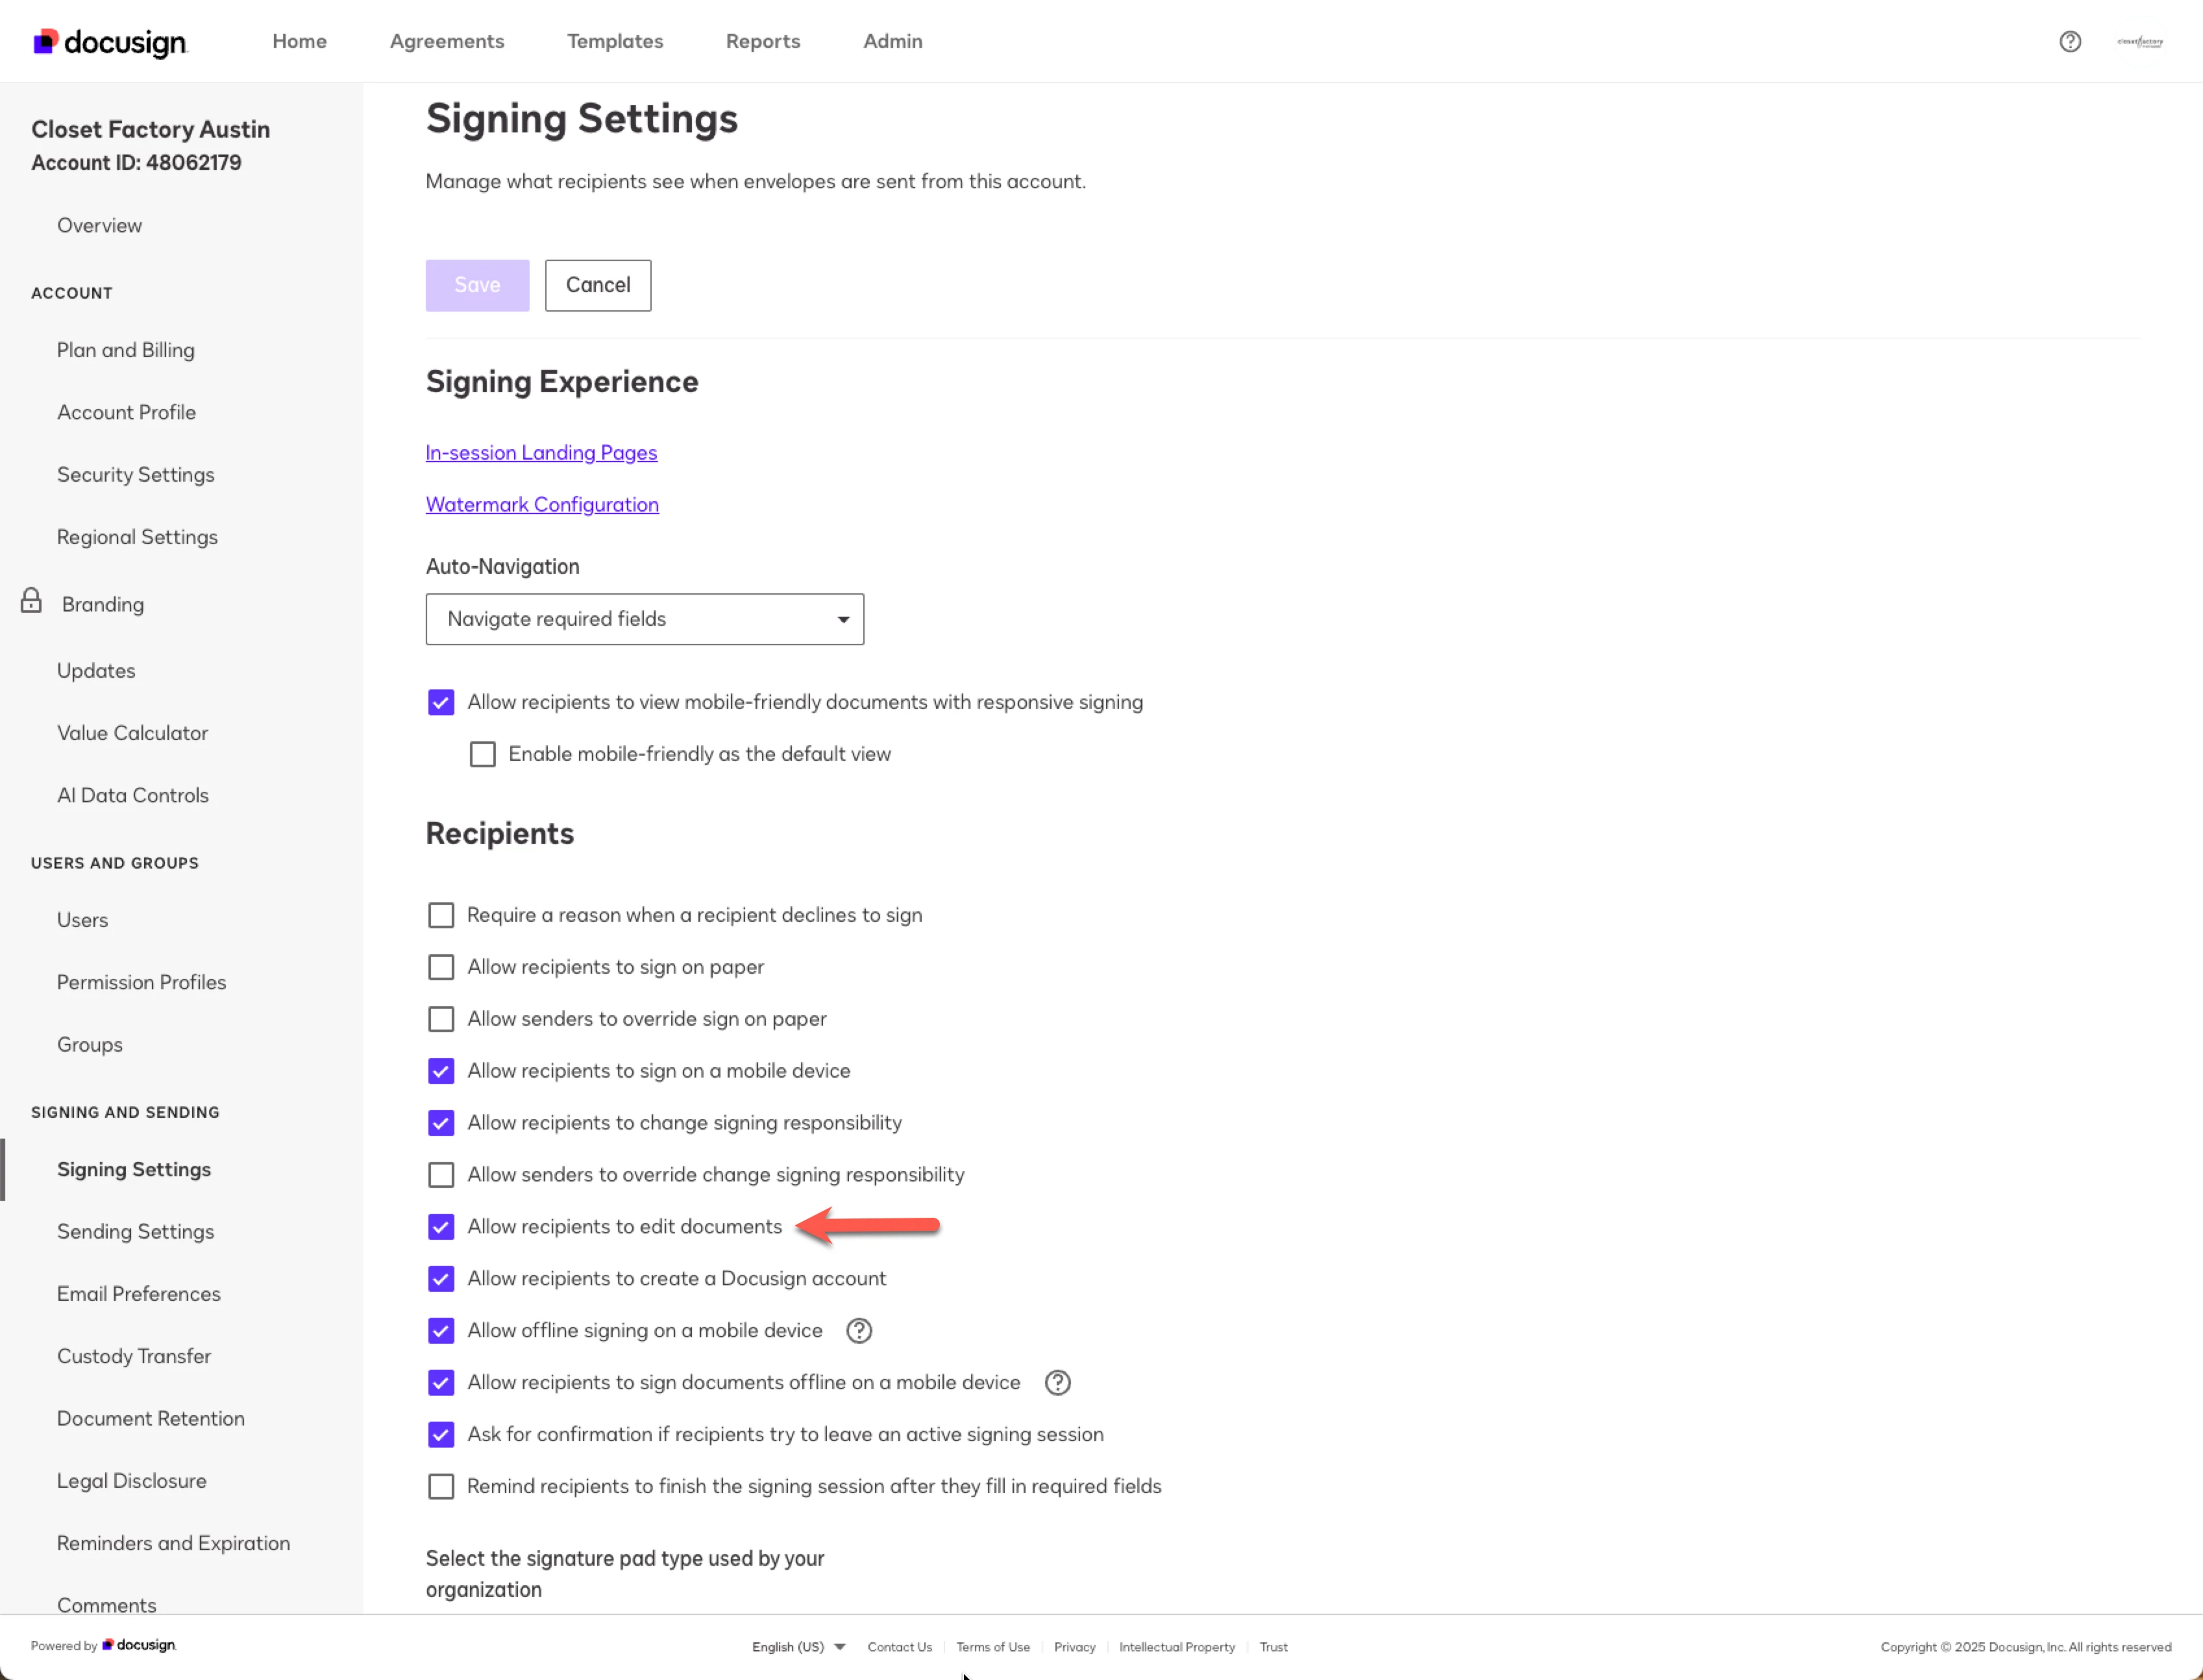
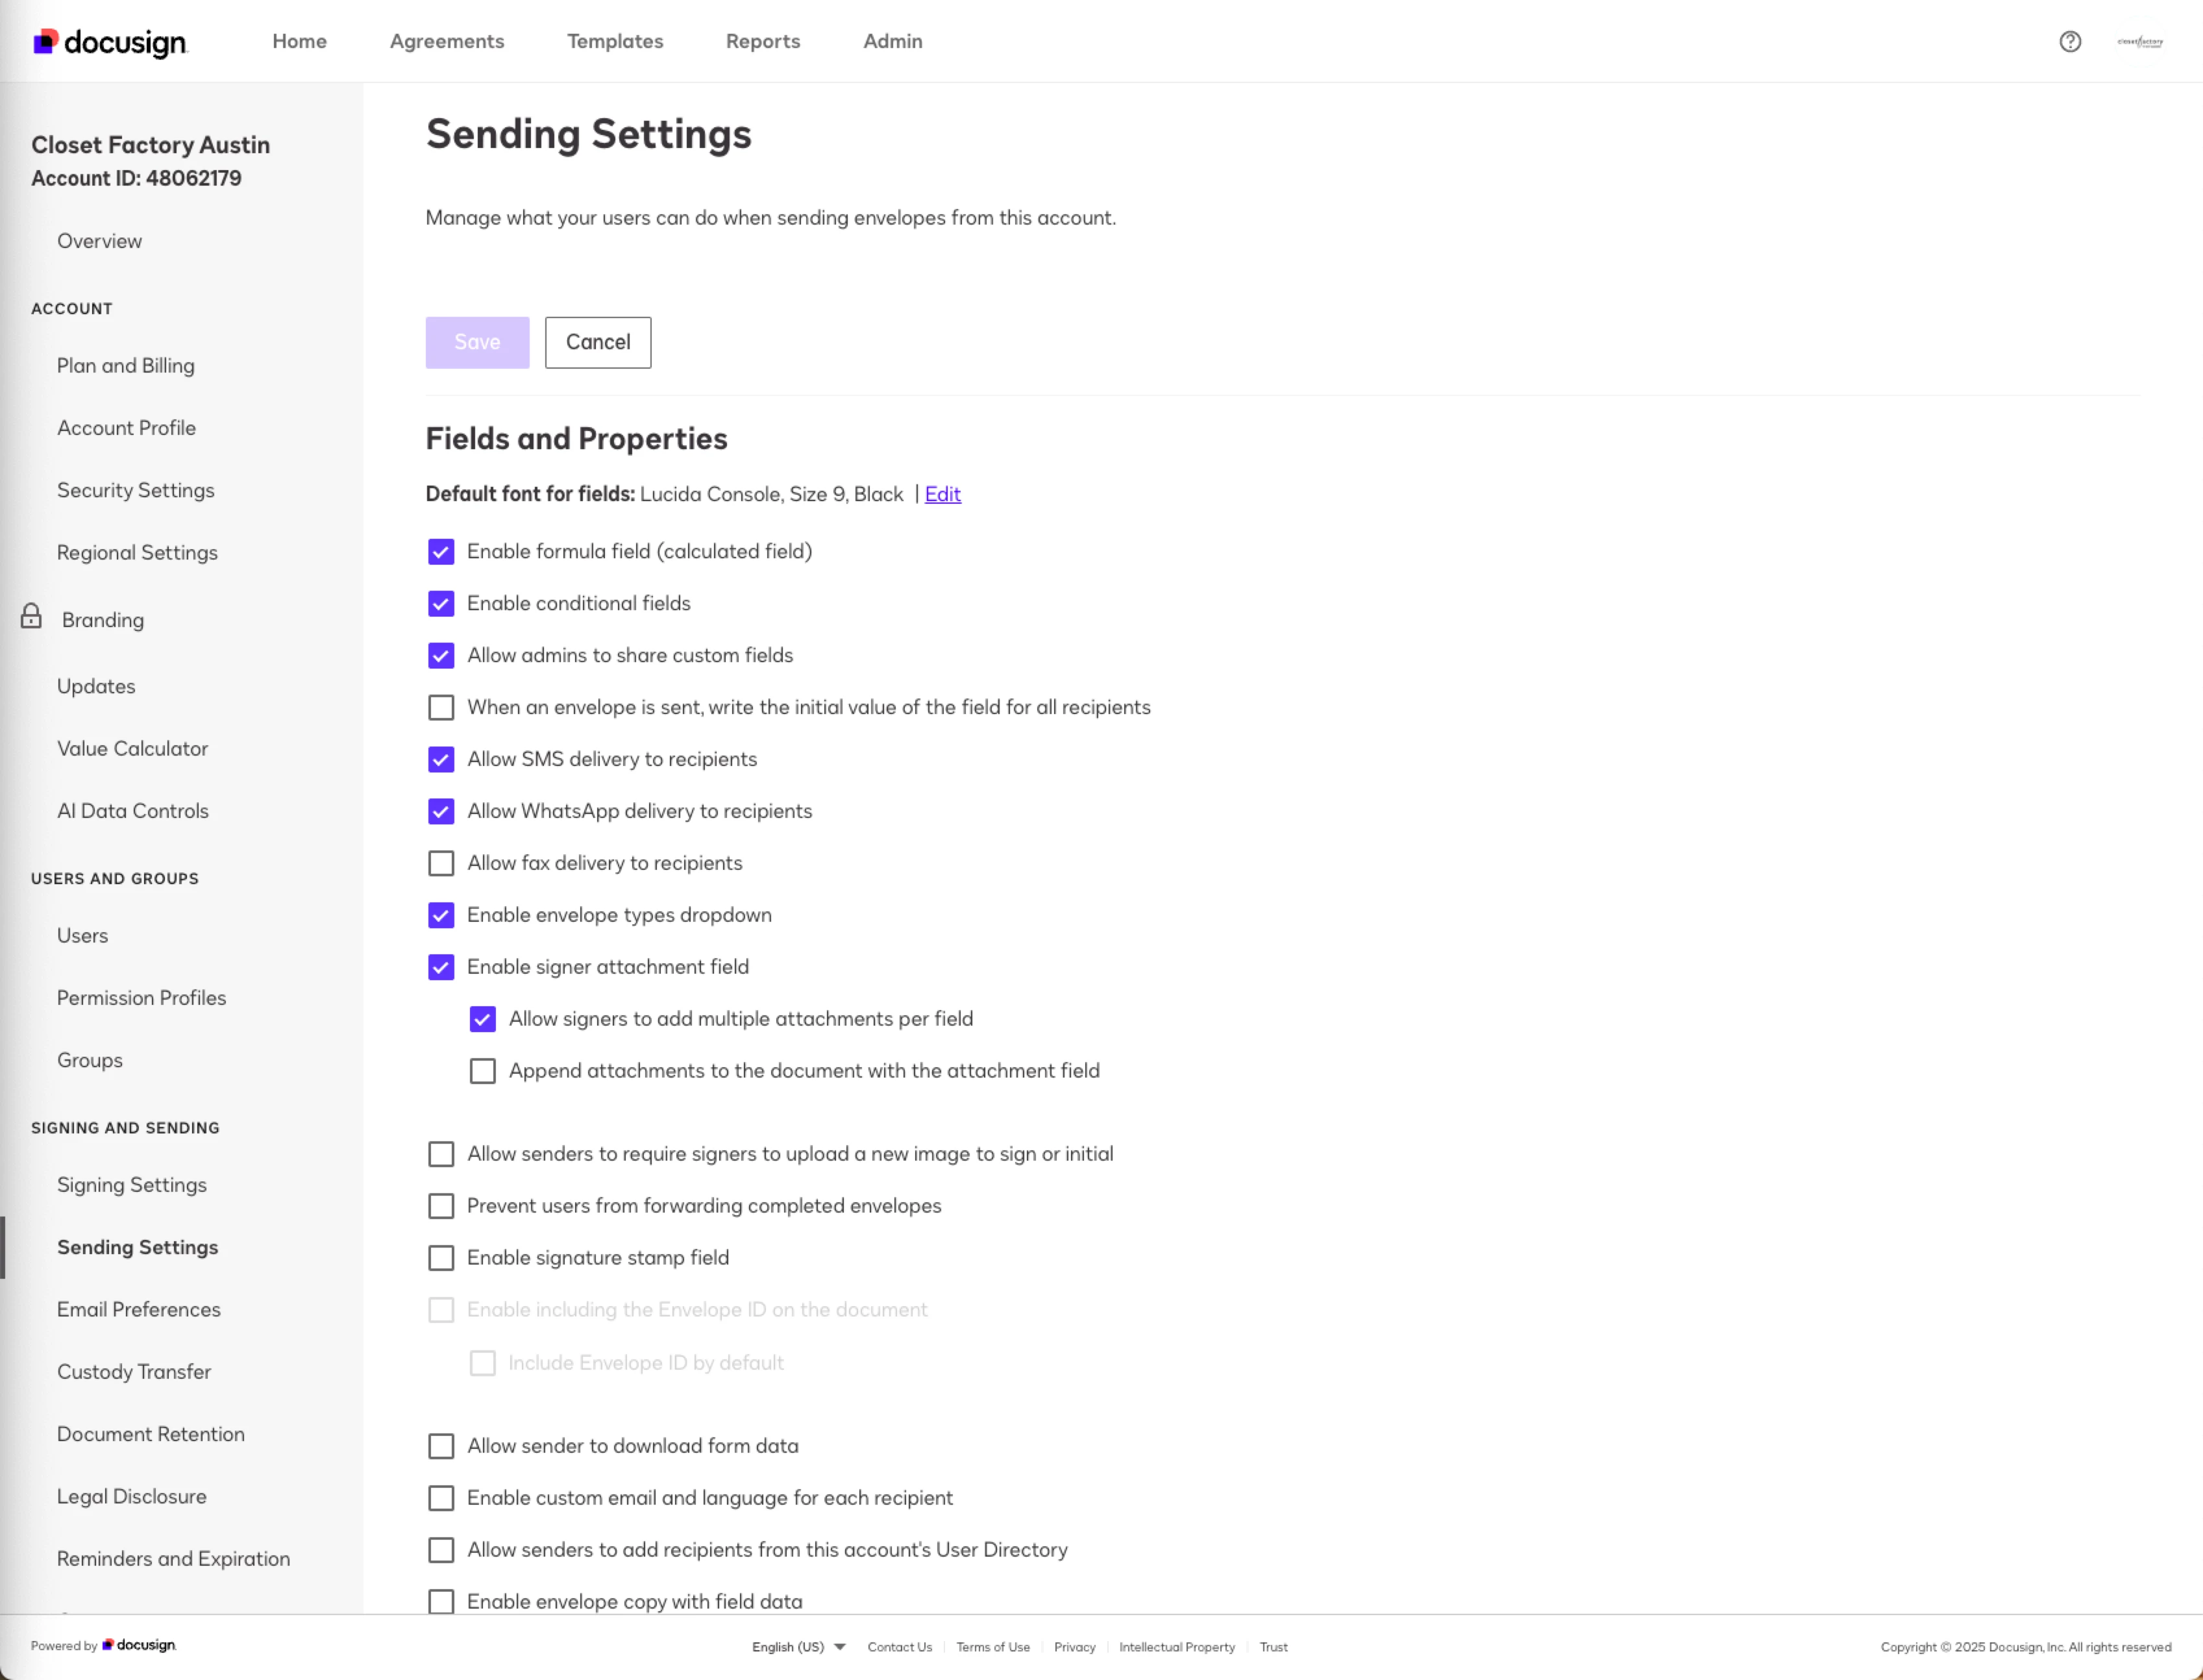
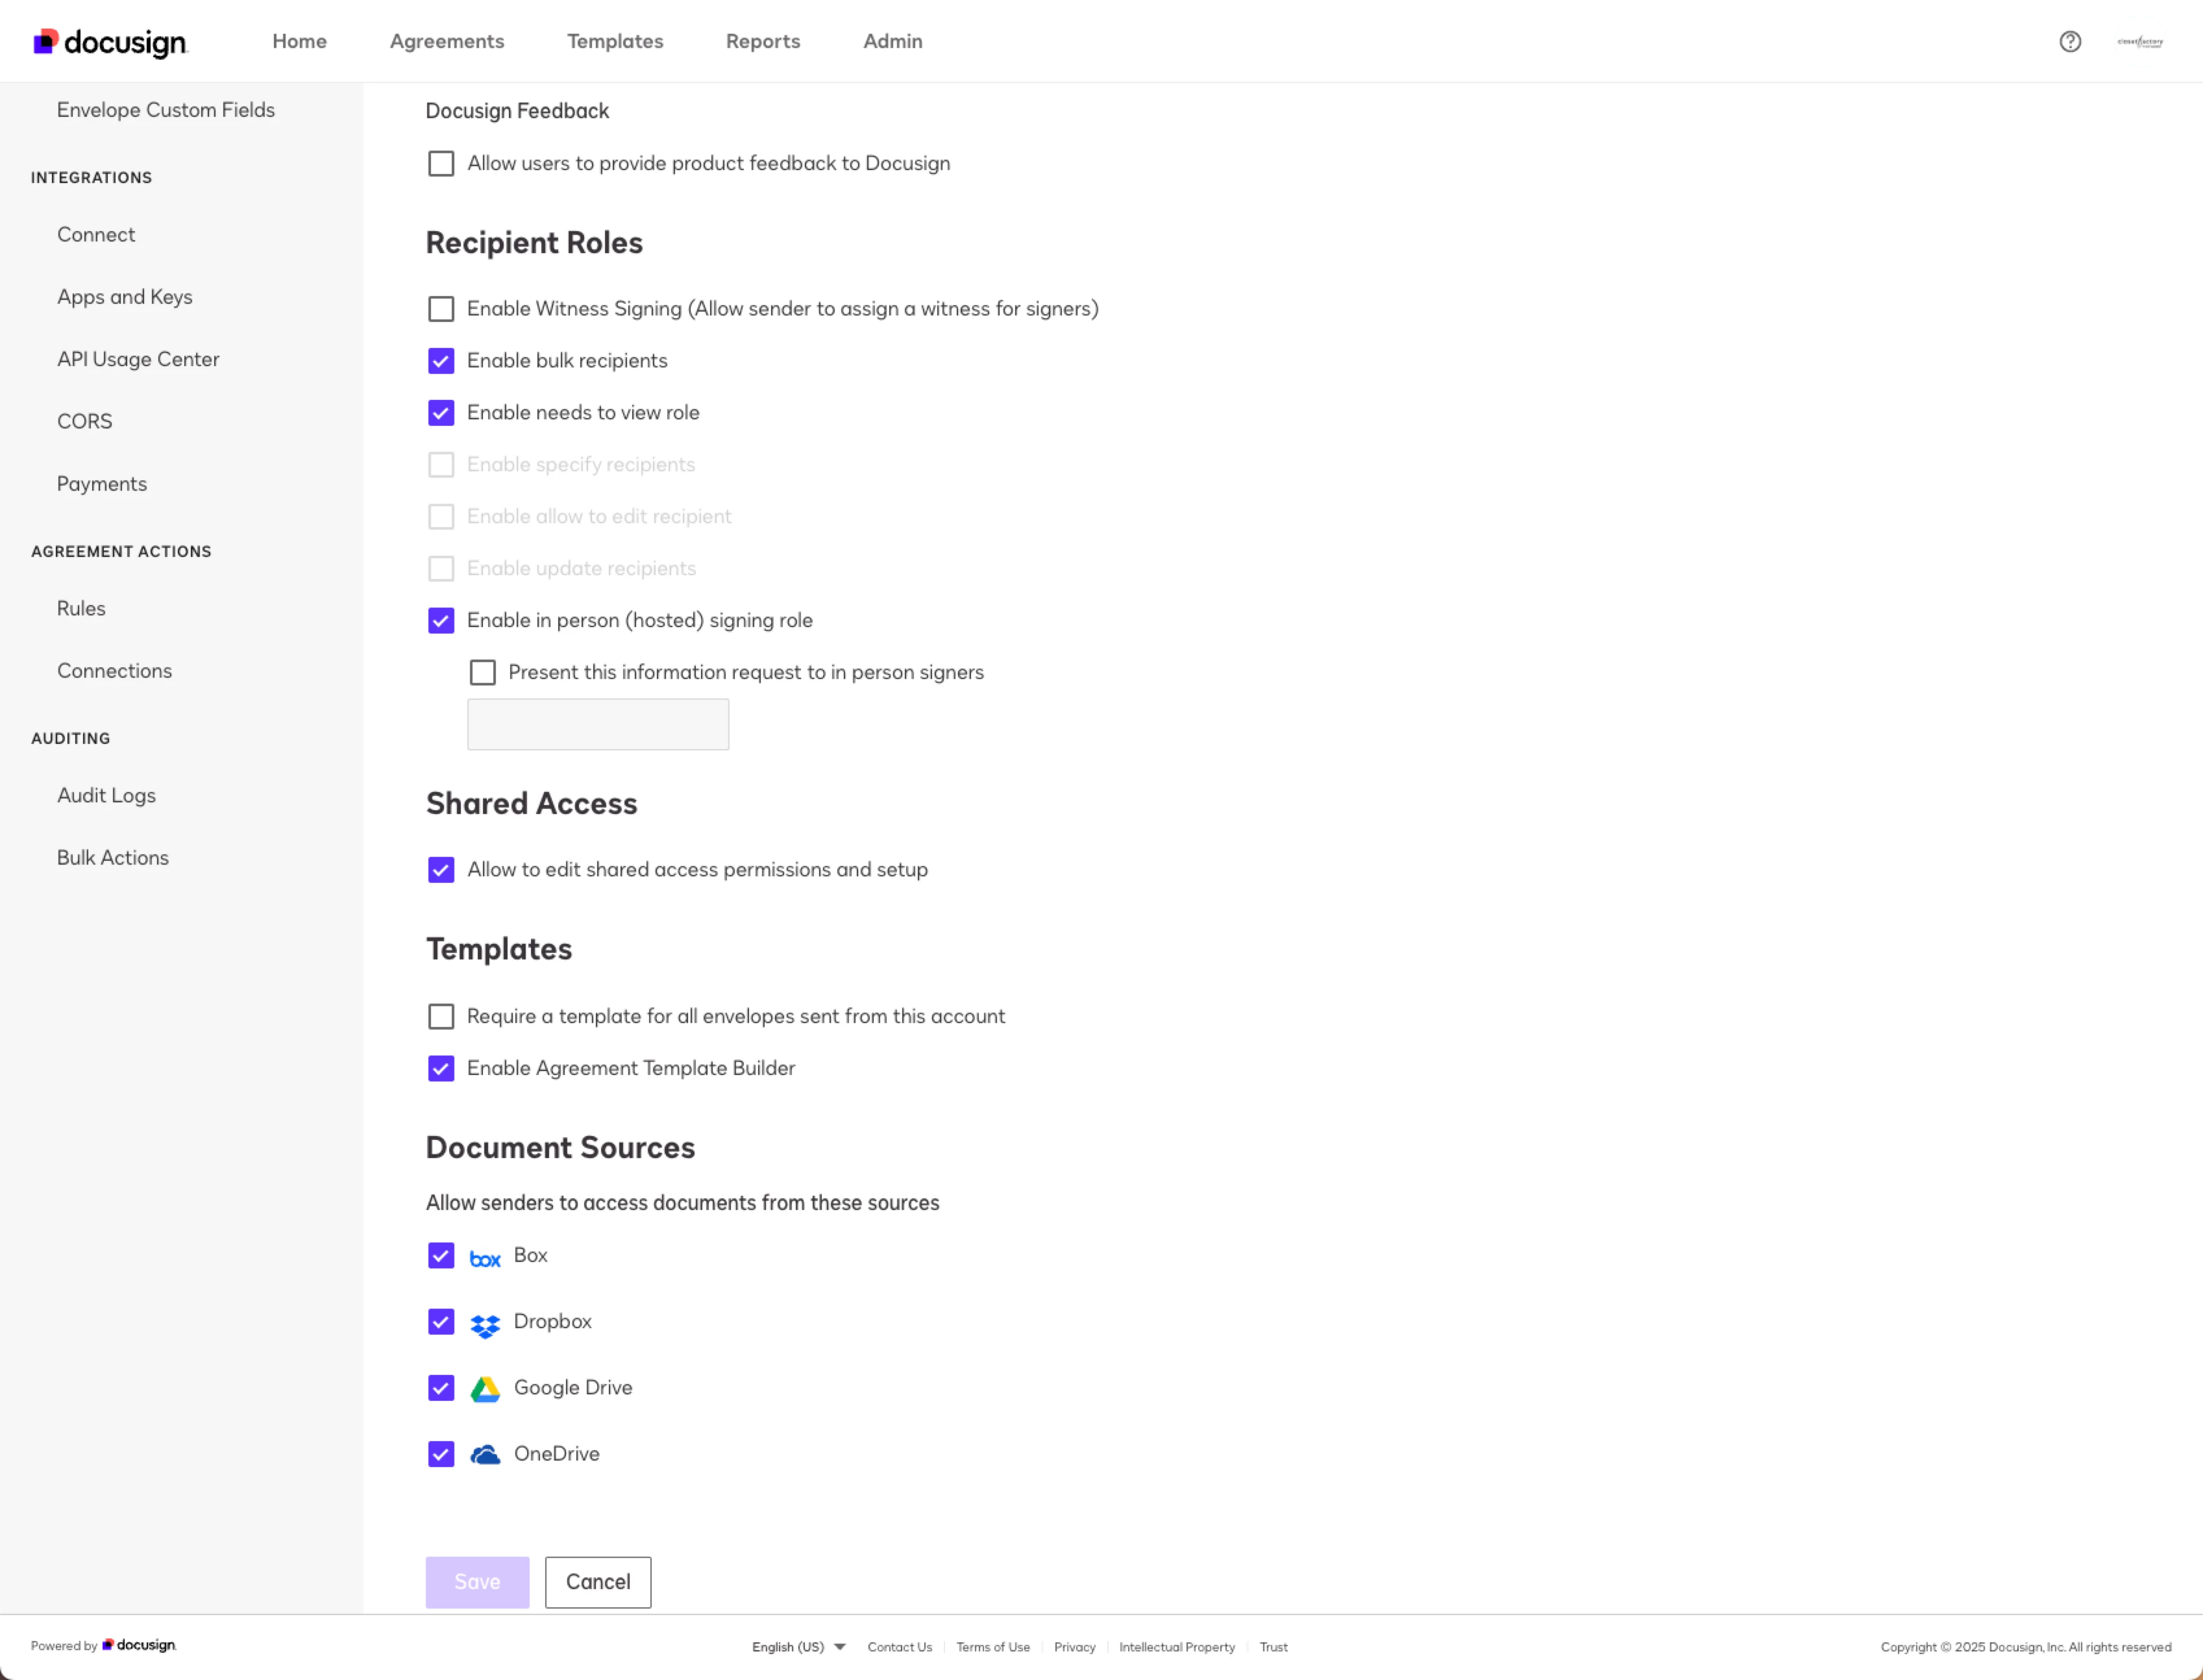
In the Admin Settings, I found something in the Signing Settings, enabled it, but it still didn’t show the Allow Edit in the template. In the Sending Settings, I did not see an edit field that was unchecked.
Yep. That’s what I’d like to do (the paralegal example in that link). But, I don’t have the Allow to Edit option as you outlined in your first post. I’ll keep digging but haven’t found it yet.
I hope you are doing well. I want to confirm if you were able to solve your issue by utilizing the suggested solution or if the information provided was useful. Let me know, and I will gladly help you address the situation as soon as possible.
Ma. Cassandra | Docusign Community Moderator Mark as “Best Answer” if this helped clarify things.
You can login or register as either a Docusign customer or developer. If you don’t already have a Docusign customer or developer account, you can create one for free when registering.
You can login or register as either a Docusign customer or developer. If you don’t already have a Docusign customer or developer account, you can create one for free when registering.
 Back to Docusign.com